The Wind And The Lion

The Wind And The Lion
German gunners range in on the U.S. Marines as they cross the vill. Figures are Old Glory German Sea Battalion conversions. Archway by Miniature Building Authority.

Sunday, May 22, 2022

TSATF re-crew guns @ TMP


There’s a very interesting thread on The Miniatures Page regarding the ability to re-crew guns with personnel other than trained gunners in the rules set The Sword And The Flame. Since I’m a big fan of these rules I planned on replying with my $0.02 and decided to post it here as well in case the discussion comes up again in the future. I think I’ll post other TSATF  rules questions, issues, house rules, mods, etc on my blog as well as time permits and questions arise.

Here’s the post on TMP in the 19th Century page under The Sword And The Flame section:

http://theminiaturespage.com/boards/msg.mv?id=560054

Here’s my reply.


What a great TSATF topic. I like the varied responses. First off, all the answers are right if that’s the way you want to play! Larry always said to play them as we want to. 


There is a rule that covers the gun crews. 

Section VIII: The Fire Phase

Subsection: B5, Pg 27

Gun Crews: It takes at least two figures to fire an artillery piece or machine gun. At least one of the figures must be a crewman for that type of weapon. 


Obviously this infers that figures other than gunners can re-crew an artillery piece as long as there is one gunner left for that type of artillery piece. 


Here’s how I do it, as long as there is one original gun crewman left unwounded. 


If the re-crew is Navy or Marine personnel they still roll 3 die per gunner. Any other imperial personnel only roll 2 die per gunner.  I rationalize it as many Navy and Marine personnel were trained as gunners as well to serve aboard ship while most other branches did not undertake this additional training. 


If the crew served weapon is an MG that normally rolls  1D6 for jamb each turn and more than half the crew is untrained, they roll the standard 1D6 trying to avoid a 5 or 6 rather than the usual 6 for a jamb. But that’s just how I do it. 


I also make different rules or judgments, most of them scenario specific for the troops involved in that battle or campaign. 


But like Larry said, play them how you want to!


Here a few Gun Crews in action for your viewing pleasure. 


Egyptian gunners, by Old Glory 25mm Miniatures , serving a Houston Ships 75mm gun on the bow of one of Last Stand Dan awesome handmade gunboats! Figs, Gun, and  Boat all built and painted by my buddy Dan. 

British gunners, by Old Glory, painted by Last Stand Dan man a 75mm gun on one of his handmade gunboats in one of the many Sudan scenarios he’s run across the country at various cons. 


German Seabatallion gunners, converted from Old Glory German Marines, painted by me, man a bow gun on one of Last Stand Dan’s gunboats in the scenario, The Hun, The Frog & The Lion. This incredible scenario was designed by my friend Patrick from The Virtual Armchair General. He sells all sorts of cool products for gaming as well as the excellent Game Card Decks for my favorite rules, The Sword And The Flame.


German Seabattalion crew man upper deck Machine Guns. 
Figures are the defunct Lead Boiler Suite Co and Old Glory German Marines, serving MG’s aboard the Cite de LaMeers custom made by Last Stand Dan during the large TSATF game The Hun, The Frog, and The Lion designed by my friend Patrick of TVAG - The Virtual Armchair General.

               
Dervish Gun crew I painted and converted from Old Glory Ansar and an Askari Minis Arab laborer. I made and painted these for my buddy Last Stand Dan. The terrain is made by Bill Daniels of Gamers Garage. 

Another Dervish / Ansar gun crew, mfg by Cannon Fodder Miniatures, serving a Foundry cannon, undercover of a Bill’s Basement custom terrain gun pit. The figs represent captured Egyptians in chains commanded by a large Ansar wielding a whip. This is another crew I painted.  

Old Glory Sikh gun crew with a Castaway Arts Miniatures
baggage camel. 


Gripping Beast WWI French Hotchkiss MG crew with Legionaries heads which I painted as a 1900 French Marine MG crew. 


Wargames Foundry Regular Afghan Gun crew supported by Afghan Regular Infantry. The infantry & gun painted by my friend Nick Stern. The crew loads grape shot to stop a charge of Cossacks in the battle for the village of Terakh Mir, NWF 1890, ongoing NWF Campaign. 


French Naval Gun Crews mfg by Askari Miniatures, painted by me, serving MG’s aboard another custom made gunboat by Last Stand Dan. Askari Minis has all manner of French colonial troops as well as many other nations and some of the best artillery pieces in 25mm. Photo from the Scenario, Kaiser’s Revenge, The Horn of Africa, 1903.

 
Spanish Gun Crews from Old Glory Miniatures SAW range
painted by my friend Mark Coolidge. He also made all the terrain for this awesome Spanish American War game he ran for us at our SMG -Club House - Das Krieg Haus in Fort Lauderdale Florida. 


German Marine MG Crew, unknown mfg painted by my friend John Murk, fighting my French Marines in an exciting TSIA game run at an HMGS-South Convention run by my buddy Dr. Dwight Jones, who also made all the terrain for this game. 


Here is an American Gun Crew from the same game and collection above, Mark Coolidge. 

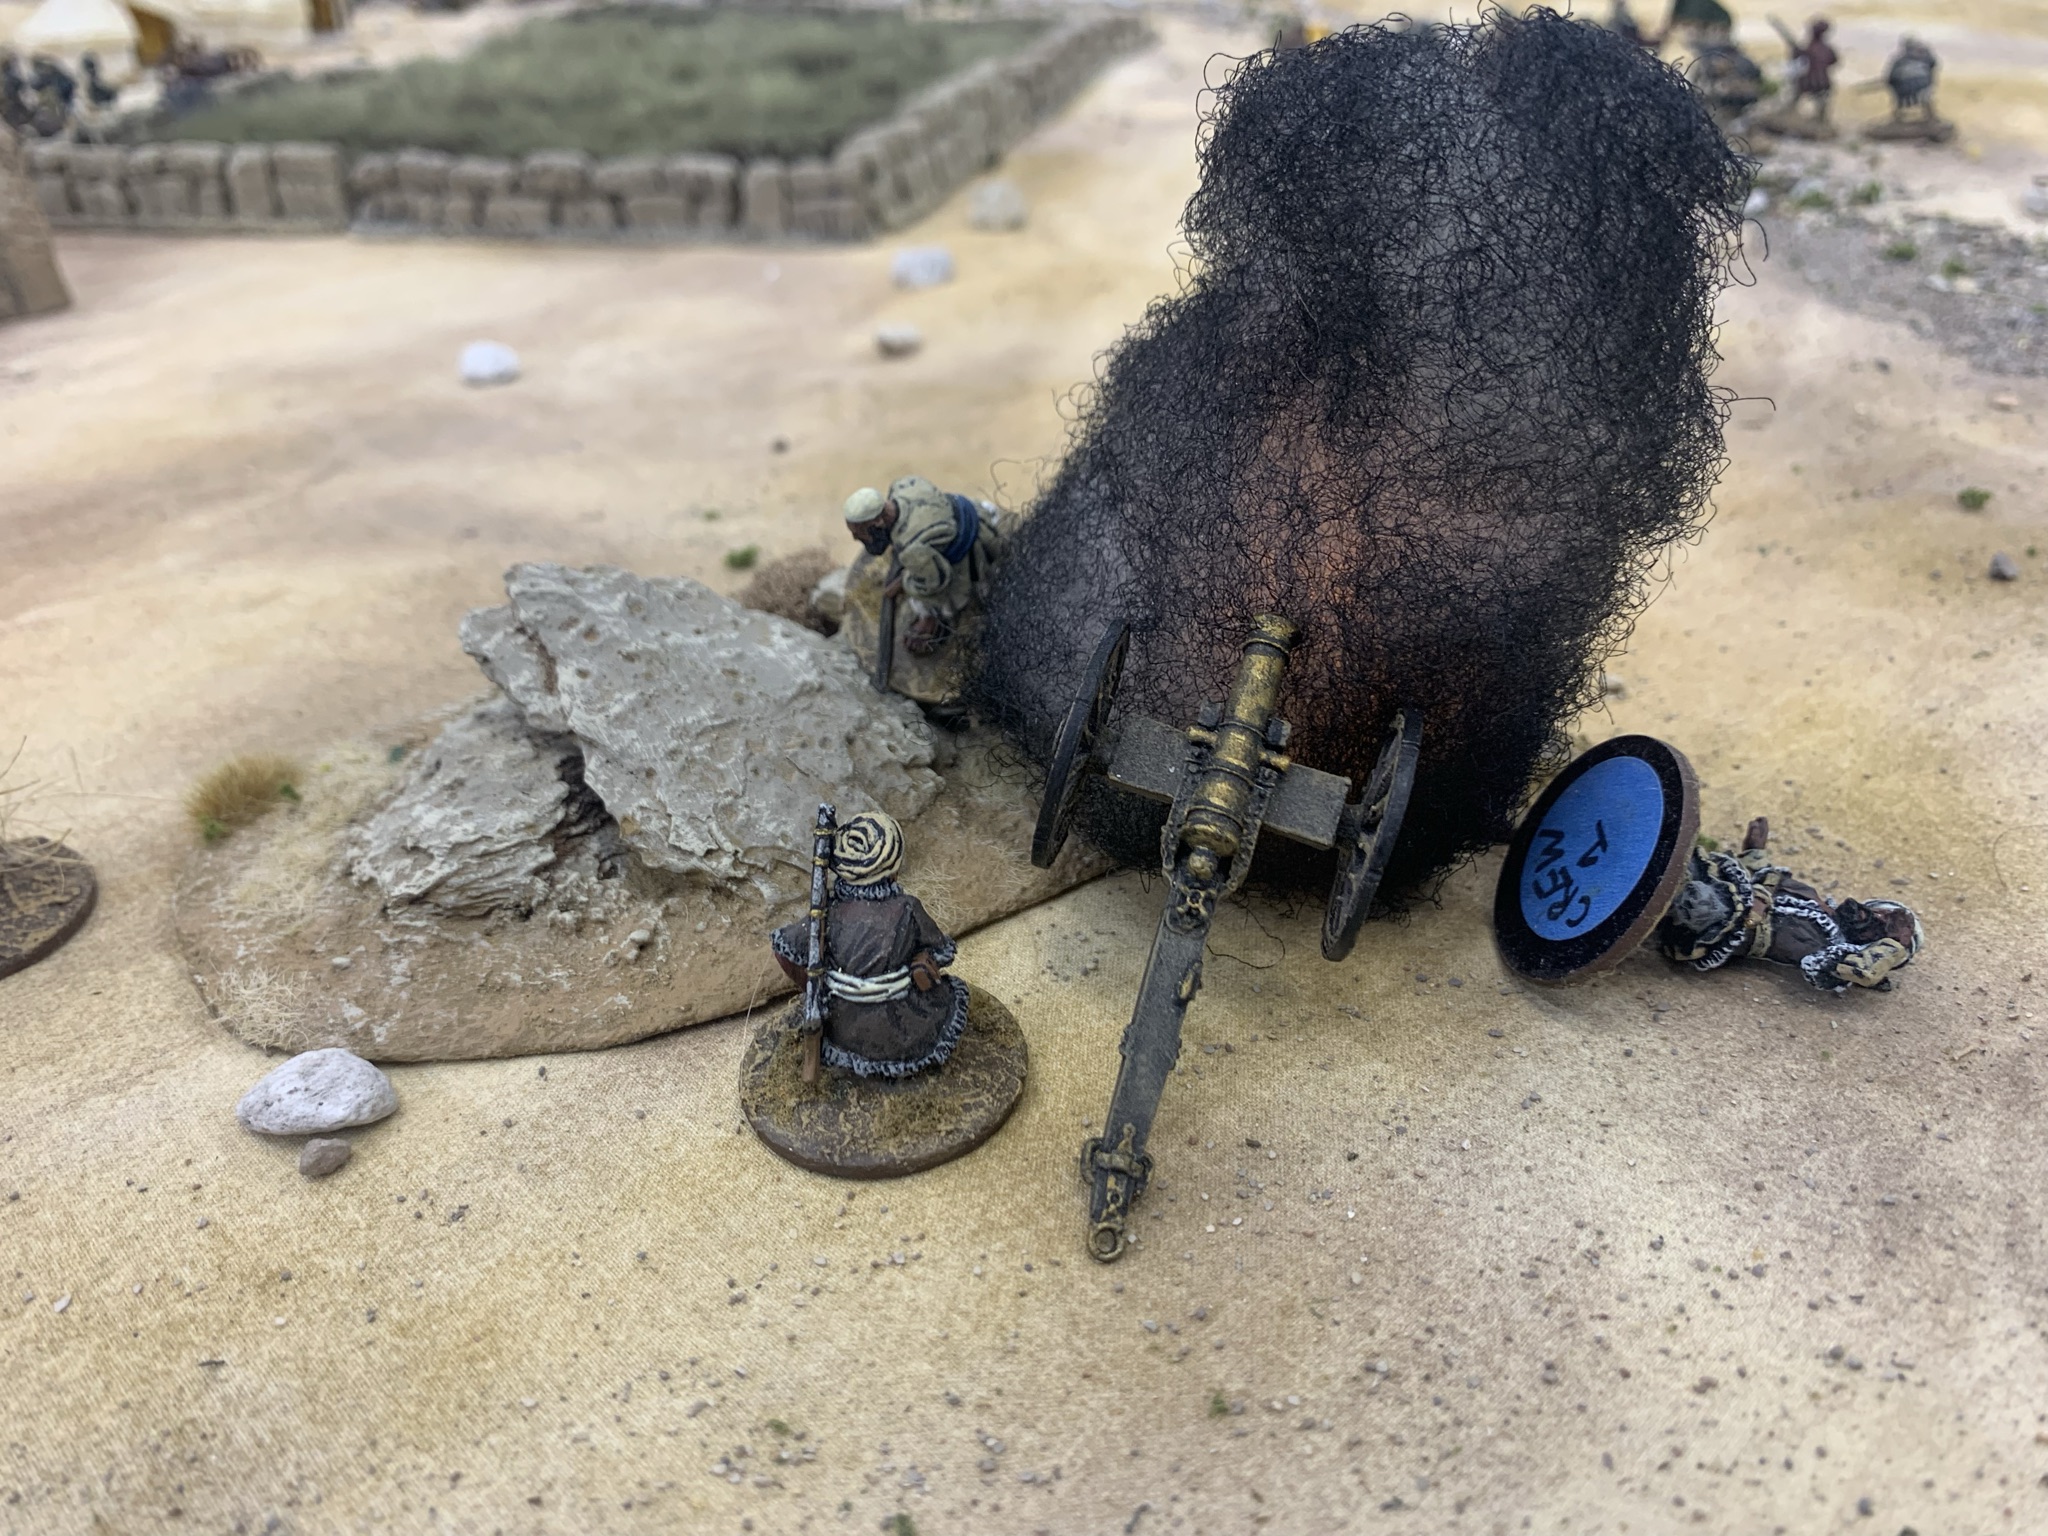
A destroyed Pathan Gun Crew made by Wargames Foundry
painted by me. This gun and crew were destroyed in a recent NWF game ran by me at Das Krieg Haus as part of our Epic LAF - Epic NWF Campaign - Never Trust Anyone on the Frontier. The gun and crew were taken out by Russian counter battery fire at the battle for the village of Terakh Mir. Artillery hit marker made by my friend Bud at Bud’s Blast Markers. He’s got an array of all sorts of amazing blast markers!


Sunday, April 3, 2022

French M1897 75mm Cannon - Askari Miniatures - 28mm


This awesome kit is very easy to build, sturdy, and a joy to paint. In my humble opinion this model is excellent and will provide a more than reasonable facsimile on the tabletop. 
However, It has been replaced by a newer version which has new wheels with the proper number of spokes and a few more parts for variations. I’ve since gotten the new model and will be building it shortly. 


My references for this project. 


Here’s the model with (2) Askari French Marine gun crews and a French Naval Landing gun crew for scale. All of my gun crews are (4) men as per my go to rules set The Sword And The Flame. These crews will see much action across both Asia and Africa!


Askari Miniatures Link: https://askari-minis.com/

Here’s the link for this model: 


Tuesday, March 1, 2022

British Rolls Royce on the Grim 1920’s Afghanistan


For my second entry in this years Analogue Hobbies Painting Challenge #12 I will be visiting the planet Vulcan. Each AHPC has a theme, this year the pictured solar system and accompanying interpretations are guidelines to follow, but only for those who choose to. Otherwise participants can paint what ever they want and score according to the standard AHPC criteria. See link below. 


The 12th annual Analogue Hobbies Painting Challenge


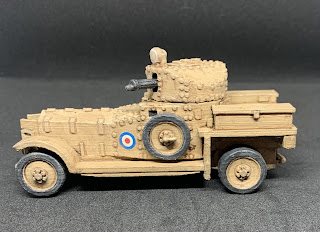
The setting is Afghanistan, 1920’s, post 3rd Afghan War. Sniping at invaders on the Northwest Frontier is not just a Pashtun pastime, it’s a mandatory full time tactic to dissuade invaders. To counter the sniping on resupply and troop convoys as well as for reconnaissance the Anglo-Indian forces began to deploy Armored Cars. 


This Rolls Royce armored car is a 1920’s version with solid tires left over after WWI and shipped to India for hard duty on the Grim. 


How does this tie into Vulcan, well, it’s a “logical” solution to a tactical problem, of course. 


This vehicle is a 3D printed model, a gift, 1 of 4 armored cars from a long time friend. It’s got the perfect amount of detail and tons of rivets. I drilled out holes in the hull and turret bottom for a magnet and scrap metal to be able to keep the turret rotating without the turret falling off.


Prime Coat: Flat Black spray paint

Body Base Coat: Glidden (paint sample) No1 Warm Caramel

Various Washes around details & rivets: Delta Ceramcoat: Burnt Umber

Wash of Delta Ceramcoat black on tires, radiator/ condenser, and wheel wells. 

Tires: PS Grimy Black with a black wash. 

High Light: with base coat. 


Points: 42

(1) 28mm vehicle points: 20

Planet Points: 20

  1. Solaris: Russians 1880’s
  2. Vulcan: 1920’s British Rolls Royce A/C


Thursday, December 2, 2021

13 Sept. 1890 - Tirakh Mir - Chitral

The rumors of a large Russian force crossing the border from Zebak into the Chitral Territory have been confirmed. Refugees from the pillaging of Zebak in Badakhshan by the Russians have made it to neighboring villages on the south side of the border. It is said that the Russians have Tajik allies with them and have made a strong base in Zebak from which to attack Chitral!

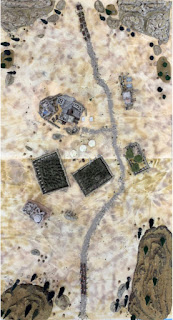
A village on the road to Tirakh Mir has been occupied by the Russians for a night laager. A young man with ties to Umra Khan and related Ali Razah Khan has left his village before the heathen feringhee made camp. Hidden in the foothills above his vill he made a sketch of the camp and his vill to take to the local Mullah. He told his siblings that it is his duty to report this defilement of his country by the northern feringhees.


Ballah Khan, younger brother of Ali Razah Khan has mobilized his forces intent on attacking the Russians in their forward camp at sunrise on the morrow. Local popular forces of the Regular Afghan Army have a fort on the border close by, will they join in the attack?

Hand drawn map made by Bhalla Khan while hiding in the foothills in the southeastern corner.


This game will be run in person at the SMG - South Florida Miniatures Gamers clubhouse, Das Krieg House in Fort Lauderdale Fl. My buddy Bob who’s running the Russians in this campaign is flying in for a visit to play this game. He’s been sending me troops to use in the game for weeks prior and I’ve been painting Russians to add to the battle as well as making custom game cards for all the forces involved. We will be using my favorite set of rules: THE SWORD AND THE FLAME


Here are some of the custom game cards. The front has the movement, fire, and morale charts while the back has the melee stats and mods. They are a half sheet of standard paper in a plastic page protector and kept in a small binder for future operations. The plastic covers also make good coasters for a frosty beer.


TO BE CONTINUED:

15 September 1890, On the road to Tirakh Mir, Chitral …


Game table set up as per Ballah Khan’s hand drawn map. 


Link to the campaign on the Lead Adventure Forum:

Never Trust Anyone on the Frontier


Monday, November 15, 2021

20 August 1890 - Bulgur Pass

Chitral Field Force, heading north through the Bulgur Pass towards the Chitral Territory to relieve Chitral Fort. 

We pick up where we left off in the last blog post, link to part I.

LAF - NWF Campaign - 1st Brigade approaching Bulgur Pass

Link to the main Epic NWF Campaign on the LAF, Lead Adventure Forum:


The column is halted as the General reads the message. Sergeant Major Brom calls a halt, orders the men to drink water, and sends out scouts from each unit to the surrounding ominous looking mountains.  


General McGuninness confers with his officers and orders the column forwards. Sergeant Major Brom orders the scouts to push further out. The Anglo-Indian force must reach Chitral Fort with all possible haste. 


The scouts move further out to protect the mule train.


The column advances in a cloud of dust, the baking sun already causing discomfort for both men and beasts alike. With a loud war cry of “Allah Akbar!!!!” fanatical Ghazi warriors burst from the tree line and charge the front of the column. After a brief moment of surprise the crack of independent rifle fire starts at the front of the column. 


Two tribes of fanatical Ghazis attack the front of the column 

stopping the entire column in their tracks. Despite the Pashtun casualties from rifle fire the Ghazis charge home and close with the feringhee. (They easily made their die role to close as I rated the Ghazis as Zulu for morale based on my friend’s recommendations, the Mad Guru himself. In addition they do not roll for stragglers!)


The Gurkhas are the first hit and loose several men in the first melee but manage to overcome the initial surprise and defeat one tribe. The 2nd charging tribe didn’t have enough movement to make contact with the column and had to wait until the following turn to charge again. 


General McGuinness orders his Battalion commanders to form combined unit squares around the precious pack mules. The officers gain control of their men, commands of “Form Square!” rings out. With parade ground precision these veterans of The Grim do just that and deftly form three separate squares.


The Ghazis charge again, and again, relentless and blood thirsty! More Pathan tribes move to the edge of the tree line and unleashe ambush fire into the tightly packed column as the Ghazis melee with the front square. 


Several Gurkha and Indian soldiers fall to the accurate Pathan fire from their flank. 


The square returns fire killing many a faithful Pashtun. 


The Bulgar Pass is filled with the crack of rifles and the fanatical screams of Ghazi & Pathan tribesmen. 


          A steadfast square guarding the rear of the column. 


From atop the pass Umra Khan’s Afridi tribesmen fire into the column taking care to not hit the precious mules since they are the main reason for this multi tribe raid. 


To the front of the column and across the valley can be seen more Pashtun warriors emerging from the hills heading towards the column intent on teaching the feringhee a lesson and stealing their mules. 


With the column halted by a melee at its front, and receiving musketry from both flanks, more Pashtun fighters see the opportunity to finish off what appears to be a struggling foe. 


From the southeastern pass emerges Mohameden warriors lead by Osamadouga Khan. With loyalty to none in this valley on this day they move into position like jackals moving in to strike at a wounded beast while the rest of the pack does the same. 


The squares advance, albeit slowly. The Ghazis charge again but are repulsed, forced back, and finally route from the table. None of the Anglo-Indian units falter despite the mounting casualties. 


Waziri warriors led by Muletail Khan, nephew of Mulehead Khan the Fakir of the frontier, the false prophet of Waziristan, the purveyor of the false book, rush forth from the southwestern pass. 


Fort Bulgur awakens with the mountain Gun battery of the 5th Bengal Artillery ranging in on the Afridi tribesmen on the crest of the mountain.


The Helipgraph crew get orders to send the signal of the attack to the nearest outpost. 


Returning from patrol B troop of the 77th Bengal Lancers comes to lend a hand. Alas the cards favor the Pashtuns of Osamadouga’s clans and bequeathed him first movement to allow him to gain the cover of Bulgur village and the surrounding rough ground to negate the Lancers charge!


Allah appears to be pulling the cards as the Pashtuns also get first fire this turn. The 77th Lancers ride through a hail of lead. 


As the Waziris advance the British square sets their sights on them, killing several, slowing them down. 


The jezzails go silent on the mountain as the musketry from the Afridi tribesmen suddenly stops. A Subadar Major of the Corp of Guides can be seen on the mountain top conversing with Buda Khan, leader of the Afridi tribesmen present. Several mules are being led into the positions of Buda Khans men by men of Corp of Guides.


The artillery shells from the 5th Bengal Artillery seem to be falling way wide of the Afridi tribesmen. Is this an error or by intent?


The Afridi tribesmen gather their mules, dismount the mountain and move towards the Waziris. 


The column continues to advance towards Fort Bulgur. With the arrival of the 77th Bengal Lancers combined with the decimation of the Ghazis and Pashtuns in the woods the resistance has slackened considerably. 


Muletail Khan orders an all out combined attack on the column. The Waziri warriors surge forward but Osamadouga’s Mohammedans stay in cover and Umra Khan’s nephew Buda Khan attacks the tribes of Muletails Waziri! The Afridi warriors fire into the Waziris killing the lashkar leader of the lead Waziri tribe. Muletail himself is only saved because he lacks the bravery to lead from the front!


The Highlanders muster and sortie forth from the fort to assist their newfound allies. 


With the death of his cousin, the treachery of the Afridis, and the indecision of the Mohammedans, Muletail Khan orders an immediate jirga to be held. As his uncle’s sway is strong in this valley the tribesmen melt back into the Grim leaving the feringhee to recover their casualties and make it safely to Fort Bulgur.


The fort resupplied, the casualties attended to, the beasts and men rested, 1st Brigade then mounts up and moves north to the Uch pass defended by the Yusufzais. 


Buda Khan is the victor this day as he secured himself 5 mules for aiding the English, or should we say outwitting the British. Will this lead to more cooperation with the feringhee invaders, a temporary alliance, or a total banishment from the Pashtun communities. 


A wise old mullah once told me…. “Never trust anyone on the Frontier!”