Chitral Field Force, heading north through the Bulgur Pass towards the Chitral Territory to relieve Chitral Fort.
We pick up where we left off in the last blog post, link to part I.
LAF - NWF Campaign - 1st Brigade approaching Bulgur Pass
The column is halted as the General reads the message. Sergeant Major Brom calls a halt, orders the men to drink water, and sends out scouts from each unit to the surrounding ominous looking mountains.
General McGuninness confers with his officers and orders the column forwards. Sergeant Major Brom orders the scouts to push further out. The Anglo-Indian force must reach Chitral Fort with all possible haste.
The scouts move further out to protect the mule train.
The column advances in a cloud of dust, the baking sun already causing discomfort for both men and beasts alike. With a loud war cry of “Allah Akbar!!!!” fanatical Ghazi warriors burst from the tree line and charge the front of the column. After a brief moment of surprise the crack of independent rifle fire starts at the front of the column.
Two tribes of fanatical Ghazis attack the front of the column
stopping the entire column in their tracks. Despite the Pashtun casualties from rifle fire the Ghazis charge home and close with the feringhee. (They easily made their die role to close as I rated the Ghazis as Zulu for morale based on my friend’s recommendations, the Mad Guru himself. In addition they do not roll for stragglers!)
The Gurkhas are the first hit and loose several men in the first melee but manage to overcome the initial surprise and defeat one tribe. The 2nd charging tribe didn’t have enough movement to make contact with the column and had to wait until the following turn to charge again.
General McGuinness orders his Battalion commanders to form combined unit squares around the precious pack mules. The officers gain control of their men, commands of “Form Square!” rings out. With parade ground precision these veterans of The Grim do just that and deftly form three separate squares.
The Ghazis charge again, and again, relentless and blood thirsty! More Pathan tribes move to the edge of the tree line and unleashe ambush fire into the tightly packed column as the Ghazis melee with the front square.
Several Gurkha and Indian soldiers fall to the accurate Pathan fire from their flank.
The square returns fire killing many a faithful Pashtun.
The Bulgar Pass is filled with the crack of rifles and the fanatical screams of Ghazi & Pathan tribesmen.
A steadfast square guarding the rear of the column.
From atop the pass Umra Khan’s Afridi tribesmen fire into the column taking care to not hit the precious mules since they are the main reason for this multi tribe raid.
To the front of the column and across the valley can be seen more Pashtun warriors emerging from the hills heading towards the column intent on teaching the feringhee a lesson and stealing their mules.
With the column halted by a melee at its front, and receiving musketry from both flanks, more Pashtun fighters see the opportunity to finish off what appears to be a struggling foe.
From the southeastern pass emerges Mohameden warriors lead by Osamadouga Khan. With loyalty to none in this valley on this day they move into position like jackals moving in to strike at a wounded beast while the rest of the pack does the same.
The squares advance, albeit slowly. The Ghazis charge again but are repulsed, forced back, and finally route from the table. None of the Anglo-Indian units falter despite the mounting casualties.
Waziri warriors led by Muletail Khan, nephew of Mulehead Khan the Fakir of the frontier, the false prophet of Waziristan, the purveyor of the false book, rush forth from the southwestern pass.
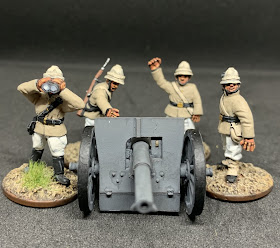
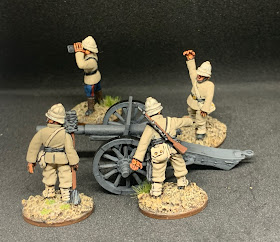
Fort Bulgur awakens with the mountain Gun battery of the 5th Bengal Artillery ranging in on the Afridi tribesmen on the crest of the mountain.
The Helipgraph crew get orders to send the signal of the attack to the nearest outpost.
Returning from patrol B troop of the 77th Bengal Lancers comes to lend a hand. Alas the cards favor the Pashtuns of Osamadouga’s clans and bequeathed him first movement to allow him to gain the cover of Bulgur village and the surrounding rough ground to negate the Lancers charge!
Allah appears to be pulling the cards as the Pashtuns also get first fire this turn. The 77th Lancers ride through a hail of lead.
As the Waziris advance the British square sets their sights on them, killing several, slowing them down.
The jezzails go silent on the mountain as the musketry from the Afridi tribesmen suddenly stops. A Subadar Major of the Corp of Guides can be seen on the mountain top conversing with Buda Khan, leader of the Afridi tribesmen present. Several mules are being led into the positions of Buda Khans men by men of Corp of Guides.
The artillery shells from the 5th Bengal Artillery seem to be falling way wide of the Afridi tribesmen. Is this an error or by intent?
The Afridi tribesmen gather their mules, dismount the mountain and move towards the Waziris.
The column continues to advance towards Fort Bulgur. With the arrival of the 77th Bengal Lancers combined with the decimation of the Ghazis and Pashtuns in the woods the resistance has slackened considerably.
Muletail Khan orders an all out combined attack on the column. The Waziri warriors surge forward but Osamadouga’s Mohammedans stay in cover and Umra Khan’s nephew Buda Khan attacks the tribes of Muletails Waziri! The Afridi warriors fire into the Waziris killing the lashkar leader of the lead Waziri tribe. Muletail himself is only saved because he lacks the bravery to lead from the front!
The Highlanders muster and sortie forth from the fort to assist their newfound allies.
With the death of his cousin, the treachery of the Afridis, and the indecision of the Mohammedans, Muletail Khan orders an immediate jirga to be held. As his uncle’s sway is strong in this valley the tribesmen melt back into the Grim leaving the feringhee to recover their casualties and make it safely to Fort Bulgur.
The fort resupplied, the casualties attended to, the beasts and men rested, 1st Brigade then mounts up and moves north to the Uch pass defended by the Yusufzais.
Buda Khan is the victor this day as he secured himself 5 mules for aiding the English, or should we say outwitting the British. Will this lead to more cooperation with the feringhee invaders, a temporary alliance, or a total banishment from the Pashtun communities.
A wise old mullah once told me…. “Never trust anyone on the Frontier!”


